Table of Content
The price of the sauna you want to build depends on many factors. You will need to consider the size and the materials you will use. A DIY sauna project can cost you anywhere from $1,000 to $12,000 or more. Always check out all the options, especially if you’re on a tight budget. A wooden stove creates a special ambience and warmth that relaxes you especially if you use sauna rocks.
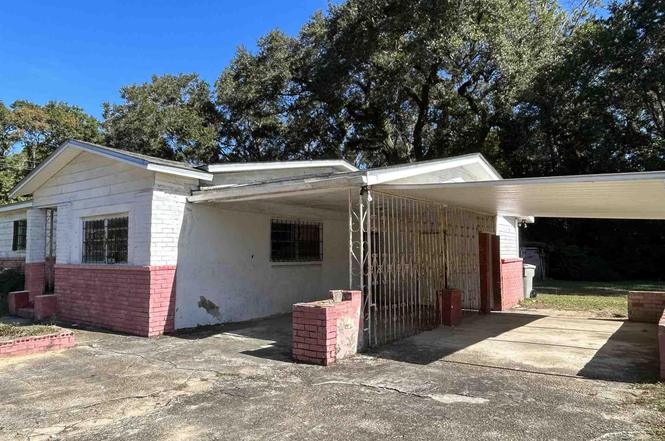
I have on my property an old concrete block out building which was used to store nothing but junk really. I also had an old iron fire place insert sitting around just slowly rusting. Before using a dry sauna, be sure to follow safety guidelines. For instance, you should avoid drinking alcohol or taking a bath. The sauna should be closed, and the temperature should be at a comfortable level.
Step 1: Making sure your sauna fits in your chosen location
Considering the cost of tools, parts, and hiring assisted labor, building your own sauna can cost almost as much as purchasing one. It is less expensive to buy sauna kits, since they are premade and easier to set up. Still, you may need to hire a professional to assist in electric or plumbing installation.
It has all the sauna benefits, along with a hidden bathtub for more relaxation. You will be able to recharge your batteries while the value of your home grows. For example, a company that is affordable, or a company with free delivery to your location.
Kit or DIY Your Own Outdoor Sauna
The time will depend on the type of wood you are using and the amount of people working on it. The final step in installing your sauna would be adding its roof/ceiling and finishing with wood shingles on top. The other important thing to make sure you get right is the insulation of your sauna.
Building personal saunas is relatively simple if a good location is selected and the adequate materials are purchased. Although styles and sizes of saunas vary, the basic principles of sauna construction are the same, and these steps will give you a general outline of how to build a home sauna. As a room that requires temperature settings, you can’t just put a sauna anywhere. This is usually the case if you’re building an outdoor sauna.
Is it more affordable to build your own sauna?
If you like the idea of turning your shed into a sauna and you’re looking for more ideas to inspire your project, don’t forget to check out this video, too. It could be 6' x 6' x 7' high, which is great for two on bunk platforms plus the heater. Don't forget to use a well sealed plastic vapor lock on the ceiling and walls unless you want to re-build a good portion of your house in a few years. You should contact the manufacturer to ask about suitability for sauna use, a potentially wet and high ambient temperature environment. The wood heater is cheap, effective, traditional and aesthetic but a little dirty. It should work fine, provided you follow the manufacturers installation instructions.
The first step was to clean the outbuilding and throw away any unusable junk that had accumulated for the past several years. There were vines growing into the building from an uncovered eve and mud-dauber wasp nests through out. One half of the ceiling was covered with paneling, which when removed, sent a shower of dirt and assorted debris down onto me.
Do You Want or Need Your Own Sauna?
Other accessories, such as handrails and backrests, can be added at this time as well. When the sauna is completed, be sure to perform the manufacturer’s scheduled maintenance. Inspect the heating unit and controls regularly for signs of burning, charring or discoloration. Discontinue use and contact the manufacturer right away with any problems or questions. While not strictly a DIY plan, we thought we would include this video to give you a few more ideas about what’s possible.
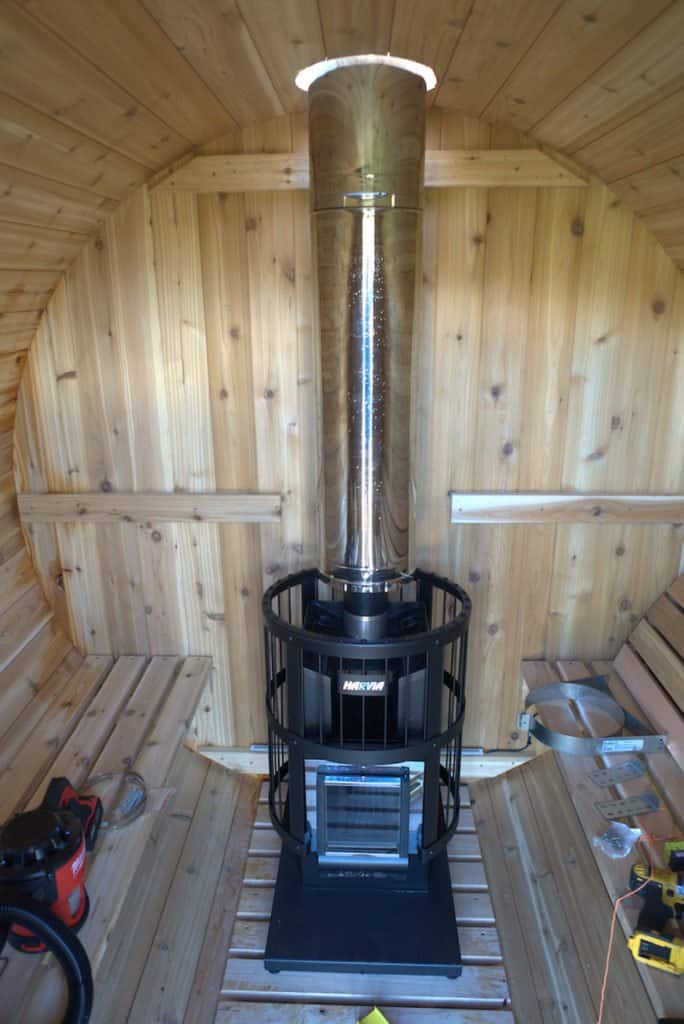
Use fiberglass insulation and an aluminum vapor barrier to line the walls and ceiling. I started framing before I installed the chimney and completed once the chimney was installed. Since I knew that the paneling would not be pieced together and would span the entire length of each wall, I was not to strict with stud spacing. Between each stud I placed 2 in thick Styrofoam panels (approx R-10 value) and sealed the gaps with Great Stuff expanding foam. I found that using a reciprocating saw with a fine tooth blade works well for cutting the panels.
Plan the spacing of your benches, such as the height in relation to the heating source, based on the heater’s instructions. Drill and mount two benches into the wall, one high and one low. The lower bench will serve as a step to the upper bench, which will be the hottest area within the sauna. Depending on the sauna style, your heating source may be wood-burning, electric, or infrared. Remember to determine the size of your heater by that of the sauna. A heater that is too small will take hours to heat and vice versa if it’s too large.

Let’s explore the infinite possibilities for your kitchen and home. Our goal is that every family has a space they can call their own while creating memorable moments with loves ones. Take some measurements to determine the height, length, breadth, and all the edges and corners. Samantha is an editor who covers all topics home-related including home improvement and repair. She edited home repair and design content at websites like The Spruce and HomeAdvisor. She also has hosted videos on DIY home tips and solutions and launched multiple home improvement review boards staffed with licensed pros.
The part of the frame against the walls was attached through the paneling to the studs with special 4-1/2 flat headed lag screws. The lower benches had post legs for support and angle bracing also attached to the studs. The upper bench just used angle bracing to allow room underneath. The benches are made from 5/4 Cedar deck planking and roughly spaced 1/2” apart. I cut and placed all the planks first without attaching then adjust the spacing to fill the frames and marked their locations. The front part of each frame where your legs would hang over by the way, is also cedar deck planking.